Det ser ud til, at dit brusehoved græder på grund af noget bruse-drama, der er opstået uden din viden! Vent, det græder ikke rigtigt, men det drypper med små dråber uden nogen åbenlys grund. Undrer du dig over, hvordan du fikser et dryppende brusehoved og stopper forstyrrelsen i at ske igen? Vi har svaret! I dette blogindlæg ser vi nærmere på de skridt, der skal til for at fikse et dryppende brusehoved!
Hvorfor drypper et brusehoved?
Så hvad får et brusehoved til at dryppe? En almindelig årsag er en løs forbindelse mellem brusearmen og selve brusehovedet, hvilket får vand til at slippe ud. Over tid kan den konstante vandgennemstrømning og slitage ved daglig brug medføre, at gummipakningen inde i brusehovedet bliver beskadiget. Denne pakning fungerer som en vigtig tætning; enhver nedbrydning kan tillade vand at sive igennem, hvilket viser sig som et vedvarende dryp.
Mineralaflejringer, ofte stammende fra hårdt vand, kan ophobes i brusehovedets dyser, blokere vandgennemstrømningen og forårsage uregelmæssige dryp. Derudover kan nedslidte eller beskadigede interne komponenter bidrage til utætheder. At identificere disse potentielle problemer er det første skridt mod at slippe af med dryppet, så du kan lave en målrettet og effektiv fejlfinding, der genopretter roen i din bruseoplevelse.
Trin 1: Undersøg problemet
Start din mission med at lukke for vandet og lade bruseren tørre. Dette trin er afgørende for en grundig undersøgelse af dryppet. Ved at observere dryppene i tørre omgivelser kan du bedre forstå utæthedens natur. Er det et langsomt, konstant dryp eller et sporadisk, rytmisk et? At identificere disse egenskaber vil guide din videre fejlfinding.
Trin 2: Brug en skruenøgle til at stramme
Med en svensknøgle i hånden skal du fokusere på forbindelsen mellem brusearmen og brusehovedet. Denne forbindelse bliver ofte løs med tiden på grund af almindelig brug. Din opgave er at stramme omløberen, som fungerer som samlingen mellem brusearmen og hovedet. Et forsigtigt vrid med uret med skruenøglen er normalt tilstrækkeligt. Dette trin løser en almindelig kilde til utætheder og forhindrer vand i at slippe ud, hvor det ikke skal.
Trin 3: Få styr på brusearmen
Ret din opmærksomhed mod selve brusearmen. Ved hjælp af skruenøglen skal du stramme forbindelsen mellem brusearmen og væggen. Dette sikrer, at armen sidder sikkert fast, så der ikke er plads til, at vand kan slippe ud. Det er vigtigt ikke at overstramme; et fast greb er alt, hvad der skal til. Dette trin er et forebyggende tiltag for at stoppe utætheder ved kilden.
Trin 4: Undersøg pakningen
Skru brusehovedet af for at afsløre gummipakningen—en afgørende komponent for at forhindre utætheder. Undersøg pakningens tilstand; hvis den er slidt, revnet eller beskadiget, er det tid til at udskifte den. Pakningen skaber en tætning mellem brusehovedet og røret, som forhindrer vand i at sive ud. Ved at sikre en ordentlig tætning eliminerer du en almindelig årsag til dryppen.
Trin 5: Rengøring og genmontering
Giv dit brusehoved lidt ekstra kærlighed. Tag det af og lad det ligge i blød natten over i et eddikebad. Dette hjælper med at opløse mineralaflejringer, der kan tilstoppe dyserne og bidrage til utætheder. Om morgenen kan du bruge en gammel tandbørste til at skrubbe eventuelle resterende aflejringer væk. Når du monterer brusehovedet igen, skal du sikre dig, at det sidder ordentligt fast. Tænd for vandet og oplev den triumferende slutning på dryp-sagaen.
Sådan! Du har med succes fikset dit dryppende brusehoved, og nu kan du nyde din daglige brusesymfoni uden nogen irriterende dryp fra brusehovedet. Med din pålidelige skruenøgle og nyfundne VVS-evner kan du sige farvel til den irriterende dryppen og nyde roen i et tæt brusemiljø. Gå ud, bruser-krigere, og lad sejrens vand vaske resterne af dryp-sagaen væk!
Hvad hvis jeg fortalte dig, at i stedet for at fokusere på dryppen fra dit nuværende brusehoved, så burde vi måske kigge på selve brusehovedet? Hvad hvis der fandtes et brusehoved, der ikke drypper, sparer på vandet og giver en fantastisk bruseoplevelse?
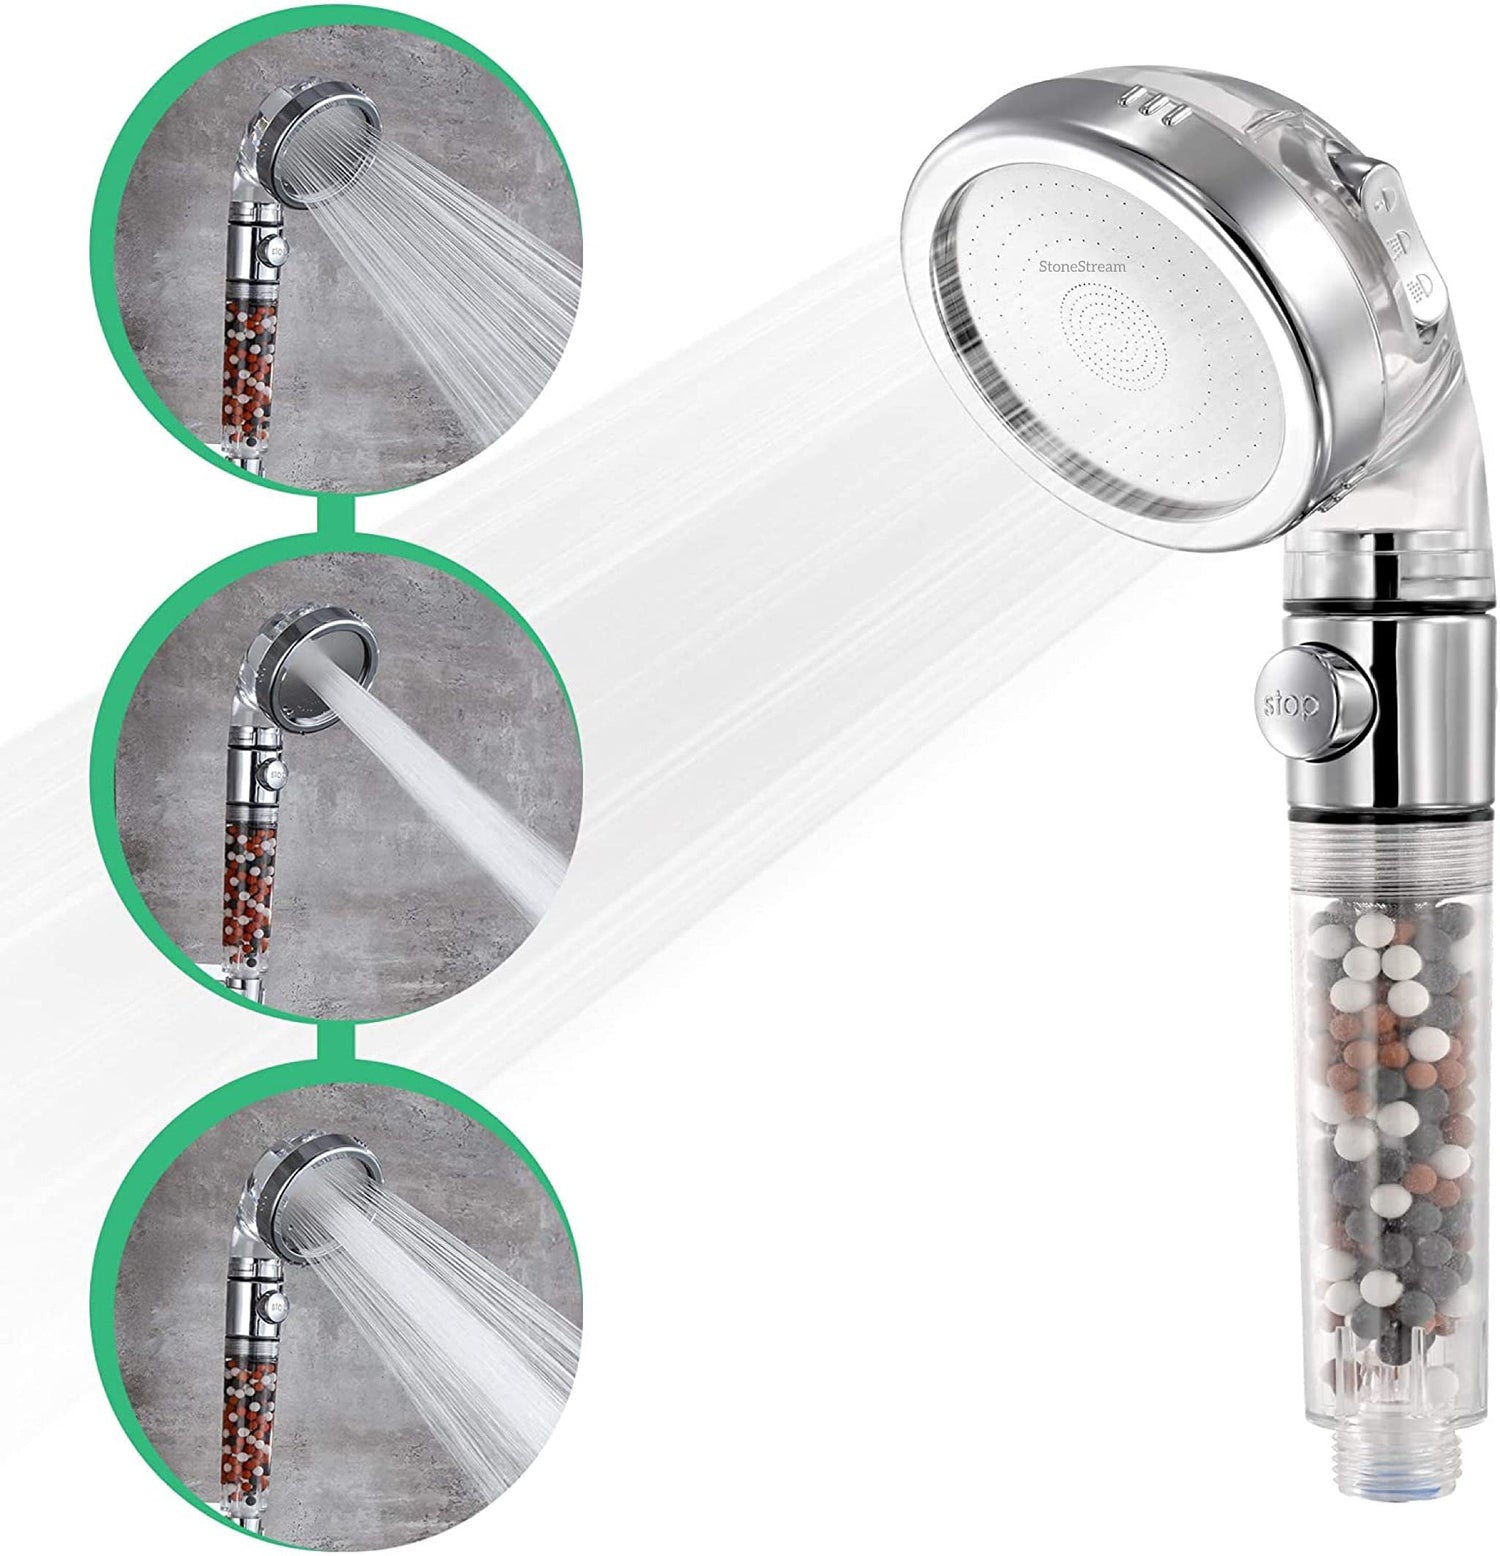
Mød EcoPower brusehovedet fra StoneStream! Med 250 laserskårne strålehuller, en STOP-knap og 3 forskellige indstillinger (se vigtigheden af et brusehoved med forskellige stråletyper lige her), er dette brusehoved det perfekte valg til dit badeværelse. EcoPower brusehovedet minimerer også vandforbruget, samtidig med at det stadig leverer den jetstråle med sit design, der øger vandets hastighed. Ikke nok med det, så forhindrer strukturen i anodiseret aluminium, at brusehovedet drypper og spilder værdifuldt vand.
Så hvad venter du på? Bestil EcoPower brusehovedet og sig farvel til dryp-dramaet på badeværelset. God badelyst!
Original EcoPower brusehoved

Køb nu
Læs også: 6 nemme måder at spare vand på derhjemme
Ofte stillede spørgsmål (FAQ)
-
Hvordan finder jeg ud af, om mit brusehoved er kilden til en utæthed?
Svar: Start med at lukke for vandet og lad området tørre. Hvis du bemærker et konstant eller sporadisk dryp, er der stor sandsynlighed for, at dit brusehoved er synderen.
-
Kan jeg fikse et dryppende brusehoved uden professionel hjælp?
Svar: Helt bestemt! Mange almindelige dryp-problemer kan løses med lidt basisværktøj, såsom en svensknøgle, og en smule gør-det-selv-entusiasme.
- Hvad skal jeg gøre, hvis det ikke stopper dryppet at stramme brusehovedet?Svar: Hvis stramning ikke løser problemet, så undersøg gummipakningen for slitage. En beskadiget pakning kan lade vand slippe igennem, og udskiftning er en simpel reparation.
-
Er det nødvendigt at udskifte hele brusehovedet, hvis det drypper?
Svar: Ikke nødvendigvis. I mange tilfælde kan et dryppende brusehoved fikses ved at se på samlinger, stramme løse dele eller udskifte en nedslidt pakning. Fuld udskiftning er normalt sidste udvej.
-
Hvor ofte bør jeg rengøre mit brusehoved for at forhindre dryp?
Svar: Det er en god vane at rengøre sit brusehoved mindst hver anden eller tredje måned. Dette hjælper med at forhindre mineralophobning, som kan føre til tilstopninger og lækager. Brug et eddikebad natten over for at opløse eventuelle aflejringer.